Agents > Oz Cloud Agents & Orchestration
Oz web app for cloud agents
# Oz web app for cloud agents import VideoEmbed from '@components/VideoEmbed.astro'; The [Oz web app](https://oz.warp.dev) provides a visual interface for managing cloud agents. You can start runs, browse agents, create schedules, configure environments, and set up integrations—all without installing Warp or using the CLI. :::note The Oz web app works on mobile devices, so you can monitor and manage your cloud agents from anywhere. ::: Watch this short demo to create an environment and run an agent using the Oz web app: <VideoEmbed url="https://youtu.be/h9Wd77leIYg" /> ## Quick reference <table><thead><tr><th width="150">Page</th><th width="120">Path</th><th>What you can do</th></tr></thead><tbody><tr><td><strong>Dashboard</strong></td><td><code>/dashboard</code></td><td>Quick actions, suggested agents, recent agents, and featured reads</td></tr><tr><td><strong>Runs</strong></td><td><code>/runs</code></td><td>View all runs, filter by status/source/creator, start new runs, inspect transcripts</td></tr><tr><td><strong>Agents</strong></td><td><code>/agents</code></td><td>Browse skills from your environments, manage agent identities, dispatch skills as agents</td></tr><tr><td><strong>Schedules</strong></td><td><code>/schedules</code></td><td>Create scheduled agents, pause/enable schedules, view run history</td></tr><tr><td><strong>Environments</strong></td><td><code>/environments</code></td><td>Create and manage environments with repos, Docker images, and setup commands</td></tr><tr><td><strong>Secrets</strong></td><td><code>/secrets</code></td><td>Create and manage Warp-managed secrets for cloud agent runs</td></tr><tr><td><strong>Integrations</strong></td><td><code>/integrations</code></td><td>Connect Slack and Linear to trigger agents from external tools</td></tr></tbody></table> <figure>  <figcaption>The Oz web app management view.</figcaption> </figure> ## When to use the web app The Oz web app is ideal when you want to: * **Monitor agent activity** — View runs, check status, and inspect outputs from any device * **Start quick runs** — Dispatch agents without opening a terminal * **Manage schedules visually** — Create and edit scheduled agents with a guided interface * **Configure environments** — Set up repos, Docker images, and setup commands through a form-based flow * **Set up integrations** — Connect Slack and Linear with a guided setup flow For scripting, automation, and CI/CD workflows, use the [Oz CLI](/reference/cli/) or [API](/reference/api-and-sdk/). --- ## Getting started When you first sign in to the Oz web app, you'll see a guided onboarding flow that helps you get started based on your goals. The onboarding asks "What brings you to Oz?" and offers three paths: * **Create an agent automation** — Walks you through setting up a scheduled agent, integration-triggered agent, or other automation * **Run Oz Cloud Agents in Warp** — Opens the Warp desktop app (or takes you to the download page) to run cloud agents interactively * **Build an app that uses agents** — Links to the [Oz Platform](/agent-platform/cloud-agents/platform/) docs for using the CLI, SDK, or API You can skip onboarding at any time to go directly to the Runs page. --- ## Dashboard The **Dashboard** page (`/dashboard`) is your starting point for common actions and discovery. It provides quick access to the features you use most. ### Quick actions Four action cards at the top let you immediately: * **New run** — Start a cloud agent run * **New agent** — Create a new skill * **New schedule** — Set up a scheduled agent * **New environment** — Configure a new execution environment Each action opens a guided side pane without leaving the Dashboard. ### Suggested agents A curated list of pre-built skills from Warp's public [oz-skills repository](https://github.com/warpdotdev/oz-skills). Click **Run** on any suggested agent to start a run with that skill. ### Recent agents Shows the last three agents you've run, so you can quickly re-run common workflows. If you haven't run any agents yet, you'll see prompts to start a new run or create your first agent. ### Featured reads Links to curated articles and documentation to help you get the most out of Oz (visible on desktop). --- ## Runs The **Runs** page (`/runs`) is your central view for monitoring cloud agent activity. It shows all runs across your account, including those triggered from the CLI, API, integrations, and schedules. ### Run details Each run displays the following information: <table><thead><tr><th width="140">Field</th><th>Description</th></tr></thead><tbody><tr><td><strong>Status</strong></td><td>Working, succeeded, failed, canceled, errored, or blocked</td></tr><tr><td><strong>Title</strong></td><td>The run's title or prompt summary</td></tr><tr><td><strong>Environment</strong></td><td>Which environment the agent ran in</td></tr><tr><td><strong>Creator</strong></td><td>Who started the run</td></tr><tr><td><strong>Source</strong></td><td>Where the run was triggered from (CLI, API, Slack, Linear, scheduled)</td></tr><tr><td><strong>Artifacts</strong></td><td>Any outputs like PRs or files created</td></tr><tr><td><strong>Credits</strong></td><td>How many credits the run consumed</td></tr></tbody></table> Click any run to open the detail pane, where you can view the full transcript, artifacts, and metadata. ### Filtering and search <table><thead><tr><th width="140">Quick filter</th><th>Shows</th></tr></thead><tbody><tr><td><strong>All</strong></td><td>All runs</td></tr><tr><td><strong>Mine</strong></td><td>Only runs you created</td></tr><tr><td><strong>Active</strong></td><td>Runs currently in progress</td></tr><tr><td><strong>Failed</strong></td><td>Runs that failed</td></tr><tr><td><strong>Recurring</strong></td><td>Runs triggered by schedules</td></tr></tbody></table> You can also search by title, prompt, or skill name, and add advanced filters for source, status, creator, and date range. --- ### Starting a new run :::note Click **New run** in the header to start a cloud agent. ::: 1. **Select an agent (optional)** — Choose a skill to use as the base instructions, or select "Quick run" to run without a skill 2. **Select an environment** — Choose which environment the agent runs in 3. **Add a prompt** — Provide context and instructions for this specific run The skill provides base instructions; your prompt adds context for this particular execution. --- ## Agents The **Agents** page (`/agents`) covers two related but distinct concepts: * **Skills** - Reusable instruction sets stored in repositories that an agent can execute. Browse skills available from your environments, plus suggested skills from Warp's public [oz-skills repository](https://github.com/warpdotdev/oz-skills). * **Agent identities** - Team-scoped bot accounts that own and execute runs. The same page is where teams create and manage agent identities, attach descriptions and secrets to them, and bind API keys to a specific identity. For the full reference on agent identities — including plan limits, the REST endpoints, and how to run as a specific identity — see [Agent identities](/agent-platform/cloud-agents/agents/). ### Skill details Each skill displays: <table><thead><tr><th width="150">Field</th><th>Description</th></tr></thead><tbody><tr><td><strong>Name</strong></td><td>The skill's identifier</td></tr><tr><td><strong>Description</strong></td><td>What the skill does</td></tr><tr><td><strong>Environments</strong></td><td>Which environments have access to this skill</td></tr></tbody></table> <figure>  <figcaption>The Agents page in the Oz web app.</figcaption> </figure> Filter by environment or switch to the **Suggested** tab to see pre-built skills for common workflows like code review, dependency updates, and documentation sync. ### Running a skill as an agent Click any skill to view its details, then click **Run** to start an agent with that skill. You can also click **New run** from the header to start a run with optional skill selection. :::note For more details on how skills work with cloud agents, see [Skills as Agents](/agent-platform/cloud-agents/skills-as-agents/). ::: ### Creating new skills Click **New skill** to create a new skill. The guided flow helps you define the skill's instructions, which are then available for future runs. <figure>  <figcaption>Creating a new skill in the Oz web app.</figcaption> </figure> ### Agent identities Agent identities are managed from the same Agents page. From the agent-identities view, you can: * **Create an agent identity** - Give it a name, an optional description, a default model and harness, and the secrets and skills runs as that identity should receive. * **Edit an existing identity** - Update its description, attached secrets, attached skills, or default configuration. * **Delete an identity** - Soft-deletes the identity and atomically deletes every API key bound to it. The default agent identity cannot be deleted. When you start a new run or schedule from the web app, the form's **Agent** dropdown lets you pick which agent identity should execute the run. **Quick run** is the default option and runs as your own user. See [Agent identities](/agent-platform/cloud-agents/agents/) for the full reference. #### Creating an agent identity Click **New agent** to open the **New agent** side pane. The pane is split into collapsible sections; only the name is required. Walk through the fields in order: 1. **Name** (required) — A short, scriptable identifier for the identity, such as `featureFlagRemover` or `deploy-bot`. 2. **Description** (optional) — A summary teammates see when picking the identity in run pickers. 3. **Prompt** (optional) — Additional instructions appended to every run started as this identity. 4. **Skills** — Use the multi-select to attach one or more skill specs the identity comes preloaded with. 5. **Base harness** — Choose the execution harness for this identity's runs: Oz (the default) or a supported third-party CLI agent. 6. **Base model** — When the chosen harness uses Warp's model picker, select the primary model the identity uses. You can leave this empty to fall back to the team default. 7. **Harness auth secret** — When the chosen harness needs its own authentication (for example, a third-party CLI agent), pick the Warp-managed secret to authenticate with. Can be overridden per run. 8. **Secrets** — Open the **Secrets** section and select the [Warp-managed secrets](/agent-platform/cloud-agents/secrets/) this identity should receive at run time. 9. **Memory stores** — Attach the memory stores this identity should read from or write to. Click **Create agent** to save. The new identity appears on the Agents page and is immediately available in run and schedule pickers. To edit an existing identity later, click it in the list, then click **Edit**. For the conceptual model — plan limits, the REST endpoints, and how API keys are bound to an identity — see [Agent identities](/agent-platform/cloud-agents/agents/). --- ## Schedules The **Schedules** page (`/schedules`) lets you create and manage scheduled agents that run automatically on a cron schedule. ### Schedule details Each schedule displays: <table><thead><tr><th width="150">Field</th><th>Description</th></tr></thead><tbody><tr><td><strong>Name</strong></td><td>A descriptive name for the scheduled task</td></tr><tr><td><strong>Frequency</strong></td><td>Human-readable description of the cron schedule (e.g., "Every Monday at 10am")</td></tr><tr><td><strong>Next run</strong></td><td>When the schedule will next execute</td></tr><tr><td><strong>Environment</strong></td><td>Which environment the scheduled agent runs in</td></tr><tr><td><strong>Agent</strong></td><td>Which skill the schedule uses (if any)</td></tr><tr><td><strong>Status</strong></td><td>Whether the schedule is active or paused</td></tr></tbody></table> <figure>  <figcaption>The Schedules page in the Oz web app.</figcaption> </figure> --- ### Creating a schedule :::note Click **New schedule** in the header to create a scheduled agent. ::: 1. **Name** — Give the schedule a descriptive name 2. **Frequency** — Set the cron schedule (with presets for common patterns) 3. **Environment** — Select the environment to run in 4. **Agent (optional)** — Choose a skill to use 5. **Prompt** — Define what the agent should do each time it runs --- ### Managing schedules Click any schedule to view its details and recent run history. From the detail pane, you can: * **Edit** the schedule configuration * **Pause** or **enable** the schedule * **Delete** the schedule * **View past runs** triggered by this schedule :::note For CLI-based schedule management, see [Scheduled Agents](/agent-platform/cloud-agents/triggers/scheduled-agents/). ::: --- ## Environments The **Environments** page (`/environments`) shows all environments configured for your account. Environments define the execution context for cloud agents, including repos, Docker images, and setup commands. ### Environment details Each environment displays: <table><thead><tr><th width="170">Field</th><th>Description</th></tr></thead><tbody><tr><td><strong>Name</strong></td><td>The environment's identifier</td></tr><tr><td><strong>Docker image</strong></td><td>The container image used for execution</td></tr><tr><td><strong>Repositories</strong></td><td>Which repos the agent can access</td></tr><tr><td><strong>Setup commands</strong></td><td>Commands run before the agent starts</td></tr></tbody></table> <figure>  <figcaption>The Environments page in the Oz web app.</figcaption> </figure> --- ### Creating an environment :::note Click **New environment** in the header to create a new environment. ::: 1. **Name** — Give the environment a descriptive name 2. **Docker image** — Specify a Docker image (Warp provides prebuilt dev images, or use your own) 3. **Repositories** — Add GitHub repos the agent should have access to 4. **Setup commands** — Define commands to run when the environment starts (e.g., `npm install`) :::note For advanced environment configuration, see [Environments](/agent-platform/cloud-agents/environments/) and the [CLI reference](/reference/cli/integration-setup/). ::: --- ## Integrations The **Integrations** page (`/integrations`) lets you configure first-party integrations with Slack and Linear. ### Available integrations <table><thead><tr><th width="120">Integration</th><th>Description</th></tr></thead><tbody><tr><td><strong>Slack</strong></td><td>Tag @Oz in messages or threads to trigger agents directly from Slack conversations</td></tr><tr><td><strong>Linear</strong></td><td>Tag @Oz on issues to trigger agents from your issue tracker</td></tr></tbody></table> <figure>  <figcaption>The Integrations page in the Oz web app.</figcaption> </figure> ### Setting up an integration Click an integration to start the guided setup flow. You'll authorize Warp to connect with the external service, select an environment, and configure any integration-specific settings. :::note For detailed integration setup instructions, see [Slack](/agent-platform/cloud-agents/integrations/slack/) and [Linear](/agent-platform/cloud-agents/integrations/linear/). ::: --- ## Related resources * [Cloud Agents Overview](/agent-platform/cloud-agents/overview/) — Learn about cloud agents and when to use them * [Agent identities](/agent-platform/cloud-agents/agents/) — Team-scoped bot accounts that own and execute runs * [Skills as Agents](/agent-platform/cloud-agents/skills-as-agents/) — Run agents based on reusable skill definitions * [Scheduled Agents](/agent-platform/cloud-agents/triggers/scheduled-agents/) — Run agents automatically on a cron schedule * [Environments](/agent-platform/cloud-agents/environments/) — Configure runtime context for cloud agents * [Managing Cloud Agents](/agent-platform/cloud-agents/managing-cloud-agents/) — Monitor agent activity and inspect runs * [Oz CLI](/reference/cli/) — Command-line interface for running agents * [Oz API & SDK](/reference/api-and-sdk/) — Programmatic access to cloud agentsUse the Oz web app to manage cloud agents, view runs, create schedules, and configure environments and integrations from any browser or mobile device.
The Oz web app provides a visual interface for managing cloud agents. You can start runs, browse agents, create schedules, configure environments, and set up integrations—all without installing Warp or using the CLI.
Watch this short demo to create an environment and run an agent using the Oz web app:
Quick reference
Section titled “Quick reference”| Page | Path | What you can do |
|---|---|---|
| Dashboard | /dashboard | Quick actions, suggested agents, recent agents, and featured reads |
| Runs | /runs | View all runs, filter by status/source/creator, start new runs, inspect transcripts |
| Agents | /agents | Browse skills from your environments, manage agent identities, dispatch skills as agents |
| Schedules | /schedules | Create scheduled agents, pause/enable schedules, view run history |
| Environments | /environments | Create and manage environments with repos, Docker images, and setup commands |
| Secrets | /secrets | Create and manage Warp-managed secrets for cloud agent runs |
| Integrations | /integrations | Connect Slack and Linear to trigger agents from external tools |
When to use the web app
Section titled “When to use the web app”The Oz web app is ideal when you want to:
- Monitor agent activity — View runs, check status, and inspect outputs from any device
- Start quick runs — Dispatch agents without opening a terminal
- Manage schedules visually — Create and edit scheduled agents with a guided interface
- Configure environments — Set up repos, Docker images, and setup commands through a form-based flow
- Set up integrations — Connect Slack and Linear with a guided setup flow
For scripting, automation, and CI/CD workflows, use the Oz CLI or API.
Getting started
Section titled “Getting started”When you first sign in to the Oz web app, you’ll see a guided onboarding flow that helps you get started based on your goals.
The onboarding asks “What brings you to Oz?” and offers three paths:
- Create an agent automation — Walks you through setting up a scheduled agent, integration-triggered agent, or other automation
- Run Oz Cloud Agents in Warp — Opens the Warp desktop app (or takes you to the download page) to run cloud agents interactively
- Build an app that uses agents — Links to the Oz Platform docs for using the CLI, SDK, or API
You can skip onboarding at any time to go directly to the Runs page.
Dashboard
Section titled “Dashboard”The Dashboard page (/dashboard) is your starting point for common actions and discovery. It provides quick access to the features you use most.
Quick actions
Section titled “Quick actions”Four action cards at the top let you immediately:
- New run — Start a cloud agent run
- New agent — Create a new skill
- New schedule — Set up a scheduled agent
- New environment — Configure a new execution environment
Each action opens a guided side pane without leaving the Dashboard.
Suggested agents
Section titled “Suggested agents”A curated list of pre-built skills from Warp’s public oz-skills repository. Click Run on any suggested agent to start a run with that skill.
Recent agents
Section titled “Recent agents”Shows the last three agents you’ve run, so you can quickly re-run common workflows. If you haven’t run any agents yet, you’ll see prompts to start a new run or create your first agent.
Featured reads
Section titled “Featured reads”Links to curated articles and documentation to help you get the most out of Oz (visible on desktop).
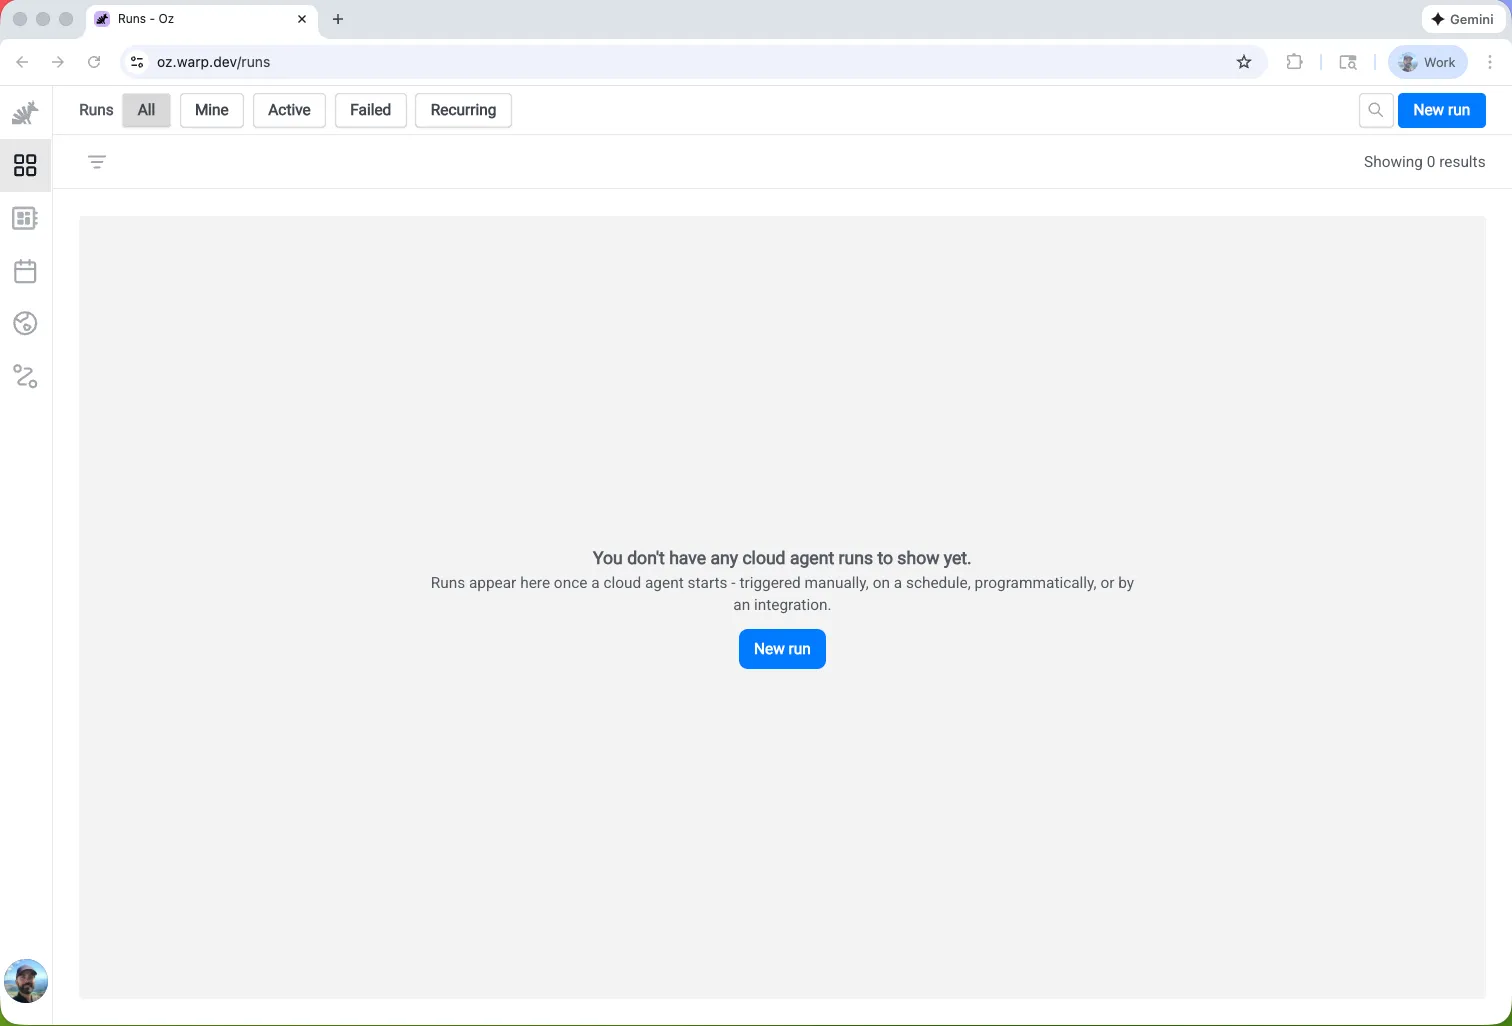
The Runs page (/runs) is your central view for monitoring cloud agent activity. It shows all runs across your account, including those triggered from the CLI, API, integrations, and schedules.
Run details
Section titled “Run details”Each run displays the following information:
| Field | Description |
|---|---|
| Status | Working, succeeded, failed, canceled, errored, or blocked |
| Title | The run’s title or prompt summary |
| Environment | Which environment the agent ran in |
| Creator | Who started the run |
| Source | Where the run was triggered from (CLI, API, Slack, Linear, scheduled) |
| Artifacts | Any outputs like PRs or files created |
| Credits | How many credits the run consumed |
Click any run to open the detail pane, where you can view the full transcript, artifacts, and metadata.
Filtering and search
Section titled “Filtering and search”| Quick filter | Shows |
|---|---|
| All | All runs |
| Mine | Only runs you created |
| Active | Runs currently in progress |
| Failed | Runs that failed |
| Recurring | Runs triggered by schedules |
You can also search by title, prompt, or skill name, and add advanced filters for source, status, creator, and date range.
Starting a new run
Section titled “Starting a new run”- Select an agent (optional) — Choose a skill to use as the base instructions, or select “Quick run” to run without a skill
- Select an environment — Choose which environment the agent runs in
- Add a prompt — Provide context and instructions for this specific run
The skill provides base instructions; your prompt adds context for this particular execution.
Agents
Section titled “Agents”The Agents page (/agents) covers two related but distinct concepts:
- Skills - Reusable instruction sets stored in repositories that an agent can execute. Browse skills available from your environments, plus suggested skills from Warp’s public oz-skills repository.
- Agent identities - Team-scoped bot accounts that own and execute runs. The same page is where teams create and manage agent identities, attach descriptions and secrets to them, and bind API keys to a specific identity.
For the full reference on agent identities — including plan limits, the REST endpoints, and how to run as a specific identity — see Agent identities.
Skill details
Section titled “Skill details”Each skill displays:
| Field | Description |
|---|---|
| Name | The skill’s identifier |
| Description | What the skill does |
| Environments | Which environments have access to this skill |
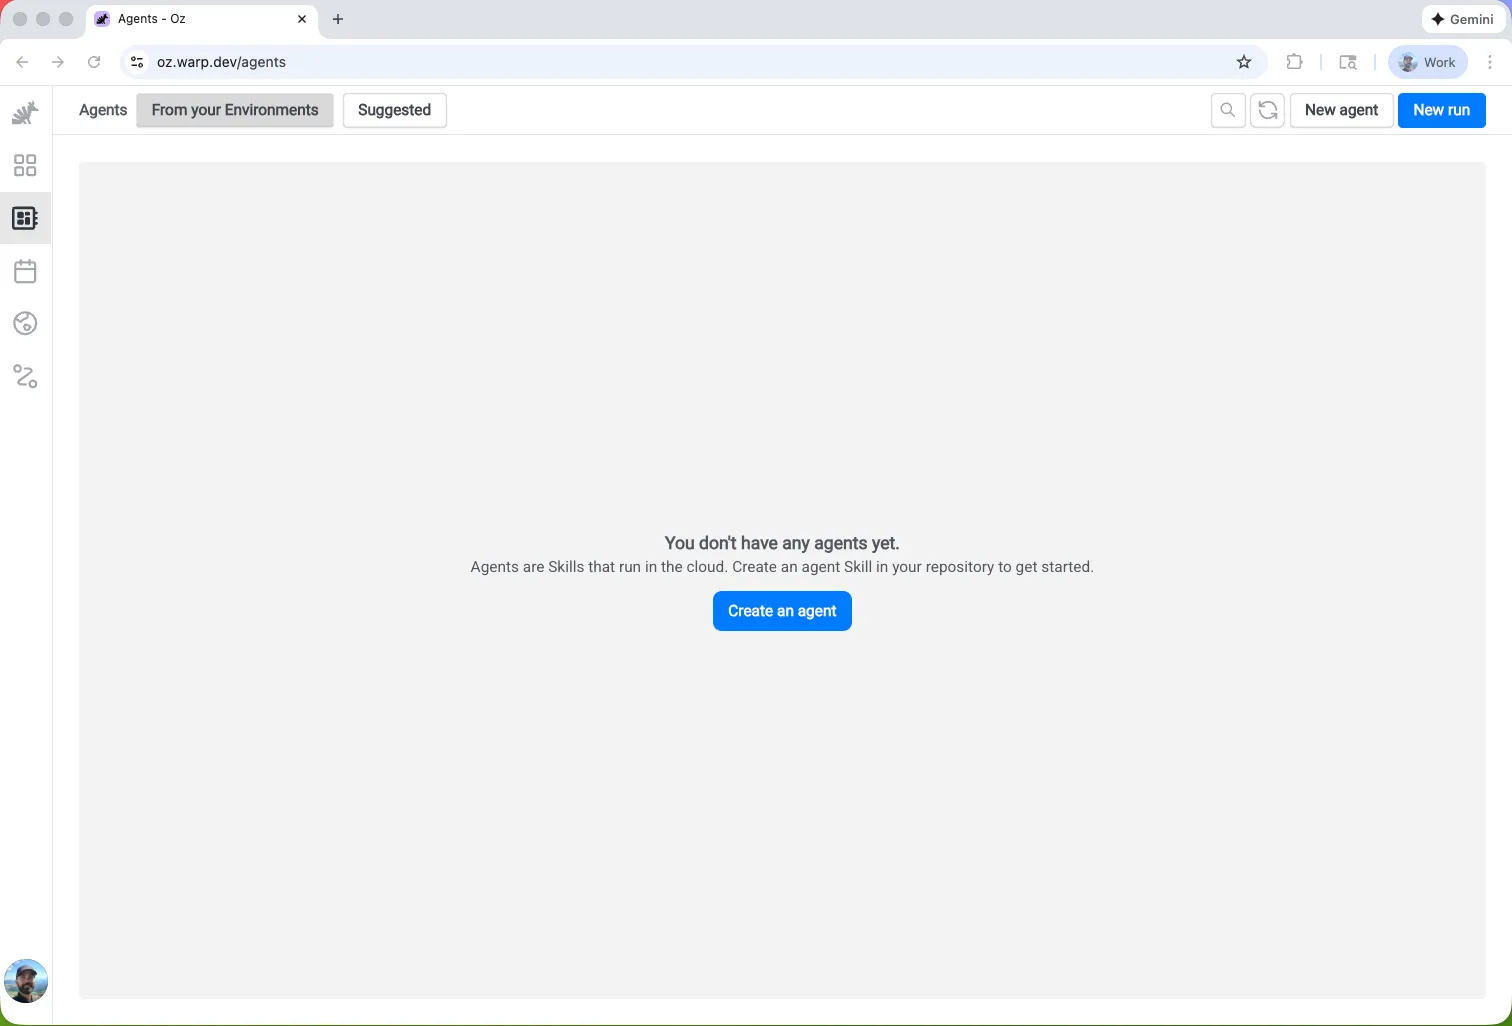
Filter by environment or switch to the Suggested tab to see pre-built skills for common workflows like code review, dependency updates, and documentation sync.
Running a skill as an agent
Section titled “Running a skill as an agent”Click any skill to view its details, then click Run to start an agent with that skill. You can also click New run from the header to start a run with optional skill selection.
Creating new skills
Section titled “Creating new skills”Click New skill to create a new skill. The guided flow helps you define the skill’s instructions, which are then available for future runs.
Agent identities
Section titled “Agent identities”Agent identities are managed from the same Agents page. From the agent-identities view, you can:
- Create an agent identity - Give it a name, an optional description, a default model and harness, and the secrets and skills runs as that identity should receive.
- Edit an existing identity - Update its description, attached secrets, attached skills, or default configuration.
- Delete an identity - Soft-deletes the identity and atomically deletes every API key bound to it. The default agent identity cannot be deleted.
When you start a new run or schedule from the web app, the form’s Agent dropdown lets you pick which agent identity should execute the run. Quick run is the default option and runs as your own user. See Agent identities for the full reference.
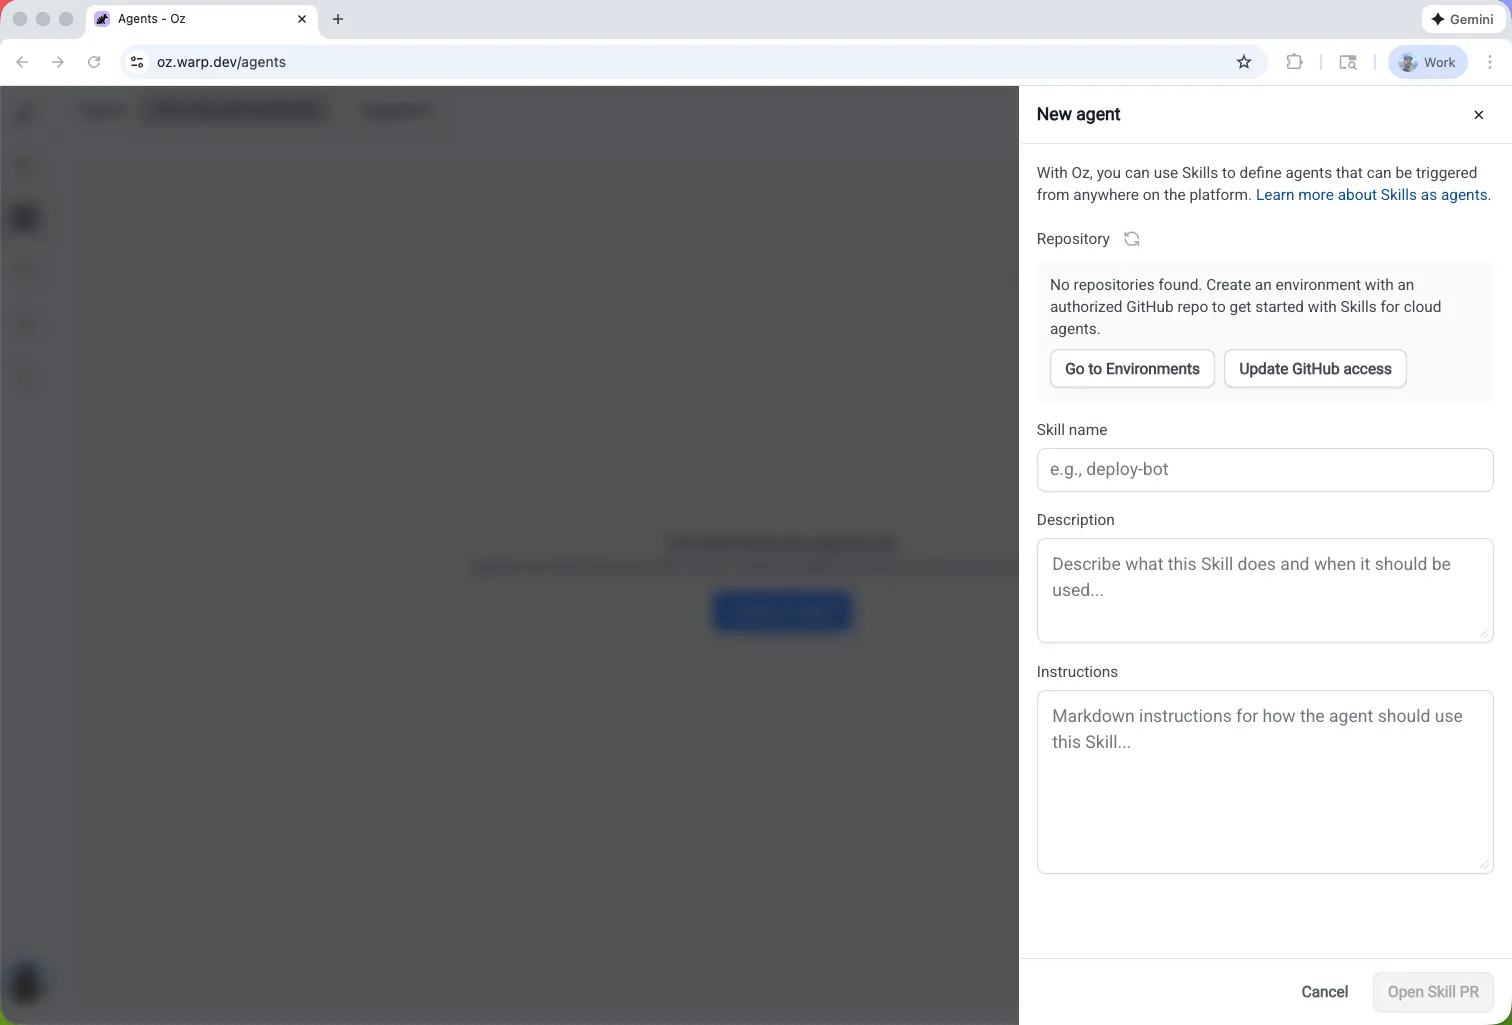
Creating an agent identity
Section titled “Creating an agent identity”Click New agent to open the New agent side pane. The pane is split into collapsible sections; only the name is required. Walk through the fields in order:
- Name (required) — A short, scriptable identifier for the identity, such as
featureFlagRemoverordeploy-bot. - Description (optional) — A summary teammates see when picking the identity in run pickers.
- Prompt (optional) — Additional instructions appended to every run started as this identity.
- Skills — Use the multi-select to attach one or more skill specs the identity comes preloaded with.
- Base harness — Choose the execution harness for this identity’s runs: Oz (the default) or a supported third-party CLI agent.
- Base model — When the chosen harness uses Warp’s model picker, select the primary model the identity uses. You can leave this empty to fall back to the team default.
- Harness auth secret — When the chosen harness needs its own authentication (for example, a third-party CLI agent), pick the Warp-managed secret to authenticate with. Can be overridden per run.
- Secrets — Open the Secrets section and select the Warp-managed secrets this identity should receive at run time.
- Memory stores — Attach the memory stores this identity should read from or write to.
Click Create agent to save. The new identity appears on the Agents page and is immediately available in run and schedule pickers. To edit an existing identity later, click it in the list, then click Edit.
For the conceptual model — plan limits, the REST endpoints, and how API keys are bound to an identity — see Agent identities.
Schedules
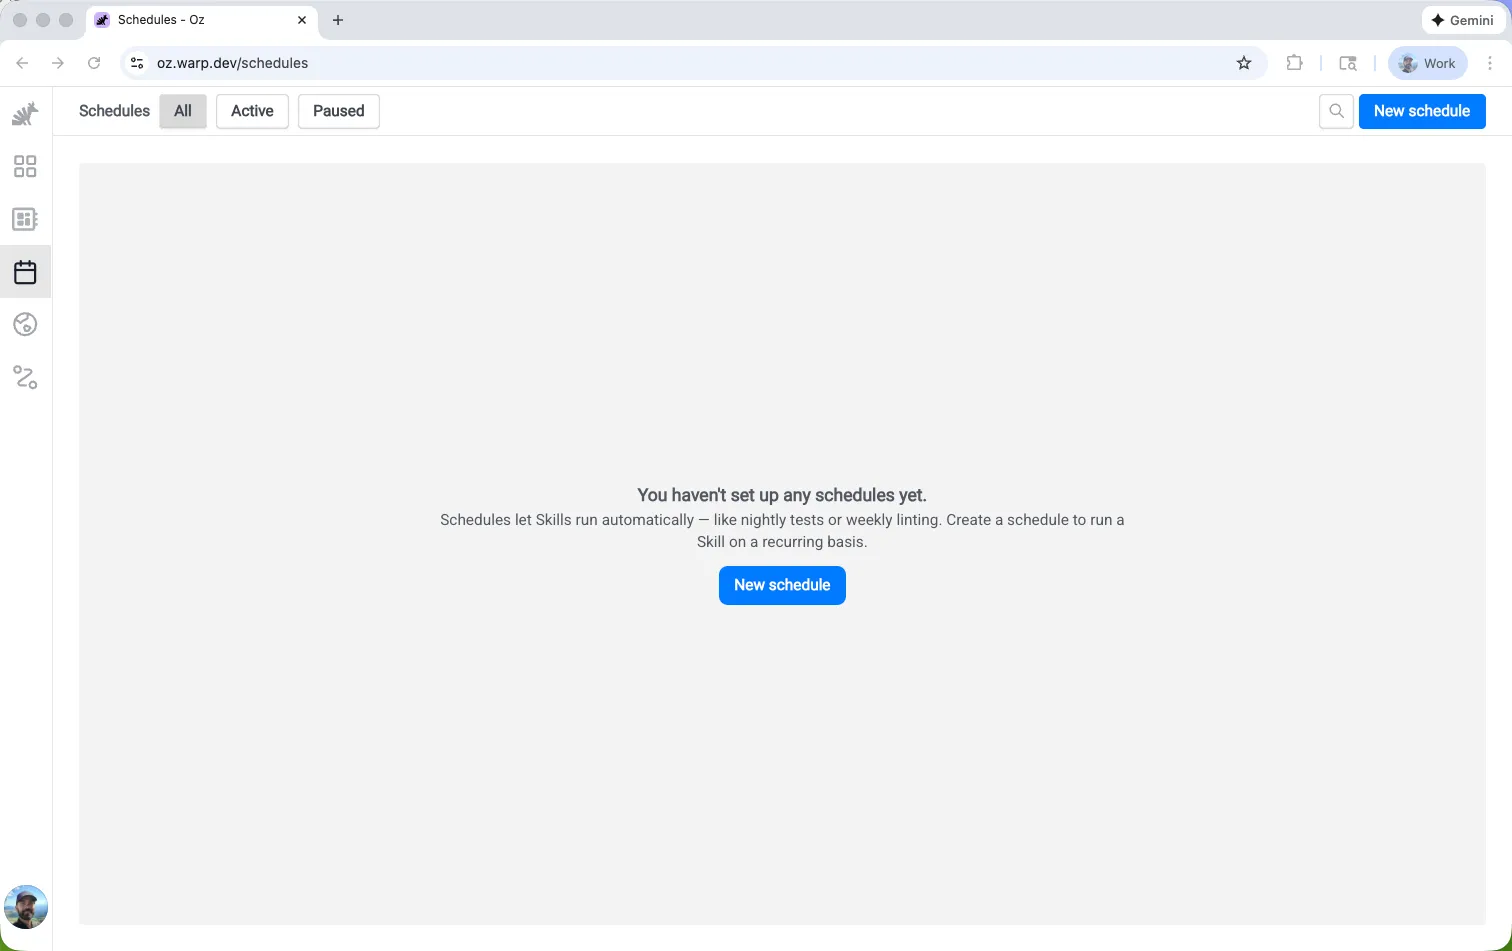
Section titled “Schedules”The Schedules page (/schedules) lets you create and manage scheduled agents that run automatically on a cron schedule.
Schedule details
Section titled “Schedule details”Each schedule displays:
| Field | Description |
|---|---|
| Name | A descriptive name for the scheduled task |
| Frequency | Human-readable description of the cron schedule (e.g., “Every Monday at 10am”) |
| Next run | When the schedule will next execute |
| Environment | Which environment the scheduled agent runs in |
| Agent | Which skill the schedule uses (if any) |
| Status | Whether the schedule is active or paused |
Creating a schedule
Section titled “Creating a schedule”- Name — Give the schedule a descriptive name
- Frequency — Set the cron schedule (with presets for common patterns)
- Environment — Select the environment to run in
- Agent (optional) — Choose a skill to use
- Prompt — Define what the agent should do each time it runs
Managing schedules
Section titled “Managing schedules”Click any schedule to view its details and recent run history. From the detail pane, you can:
- Edit the schedule configuration
- Pause or enable the schedule
- Delete the schedule
- View past runs triggered by this schedule
Environments
Section titled “Environments”The Environments page (/environments) shows all environments configured for your account. Environments define the execution context for cloud agents, including repos, Docker images, and setup commands.
Environment details
Section titled “Environment details”Each environment displays:
| Field | Description |
|---|---|
| Name | The environment’s identifier |
| Docker image | The container image used for execution |
| Repositories | Which repos the agent can access |
| Setup commands | Commands run before the agent starts |
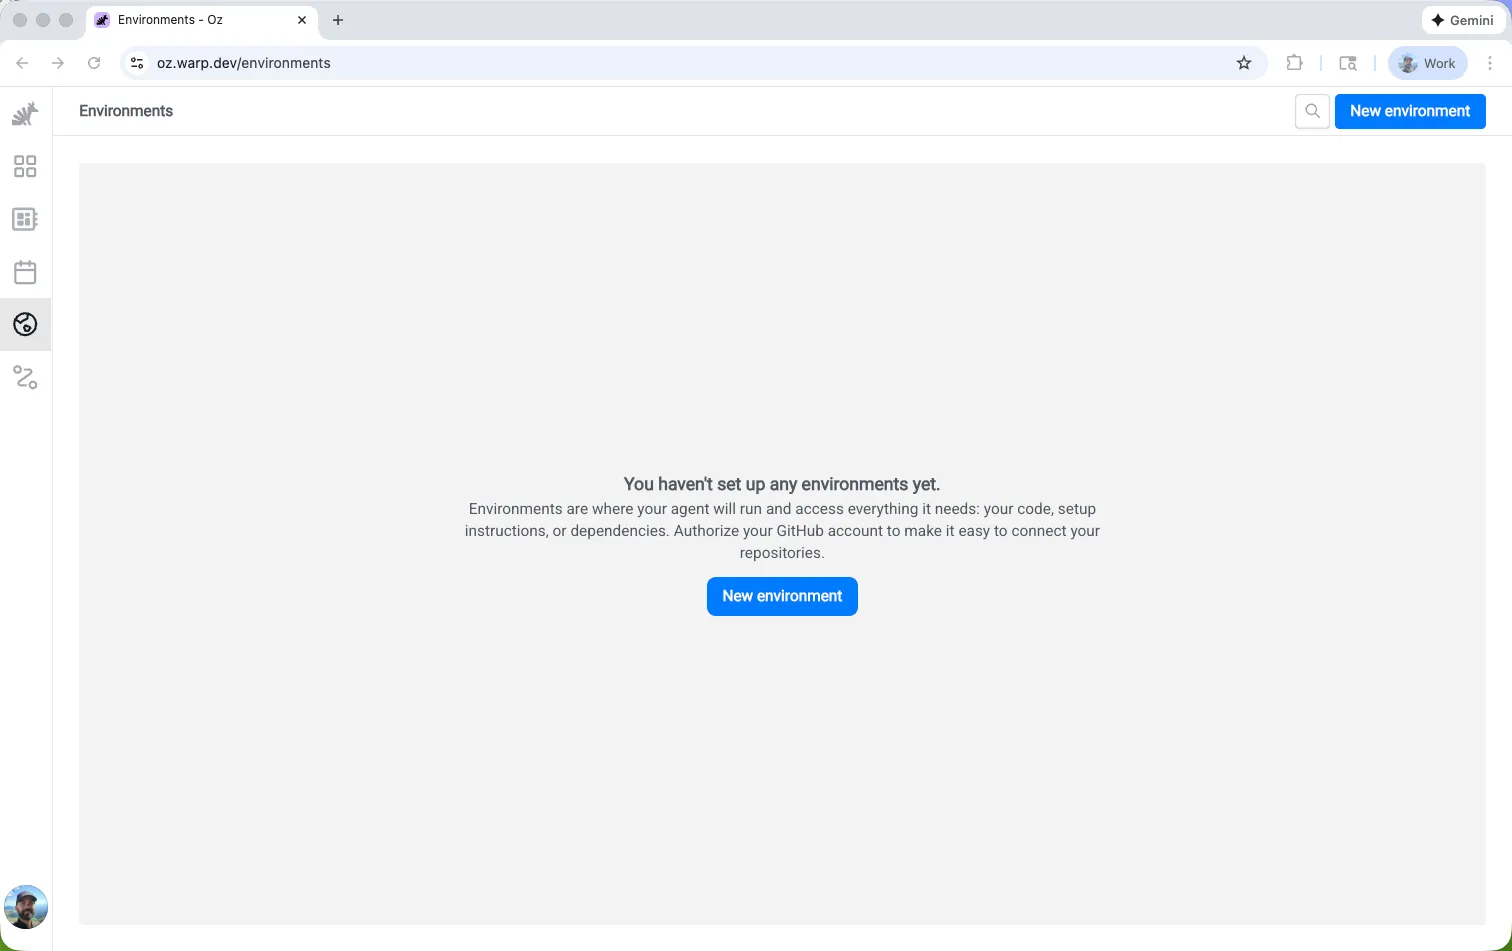
Creating an environment
Section titled “Creating an environment”- Name — Give the environment a descriptive name
- Docker image — Specify a Docker image (Warp provides prebuilt dev images, or use your own)
- Repositories — Add GitHub repos the agent should have access to
- Setup commands — Define commands to run when the environment starts (e.g.,
npm install)
Integrations
Section titled “Integrations”The Integrations page (/integrations) lets you configure first-party integrations with Slack and Linear.
Available integrations
Section titled “Available integrations”| Integration | Description |
|---|---|
| Slack | Tag @Oz in messages or threads to trigger agents directly from Slack conversations |
| Linear | Tag @Oz on issues to trigger agents from your issue tracker |
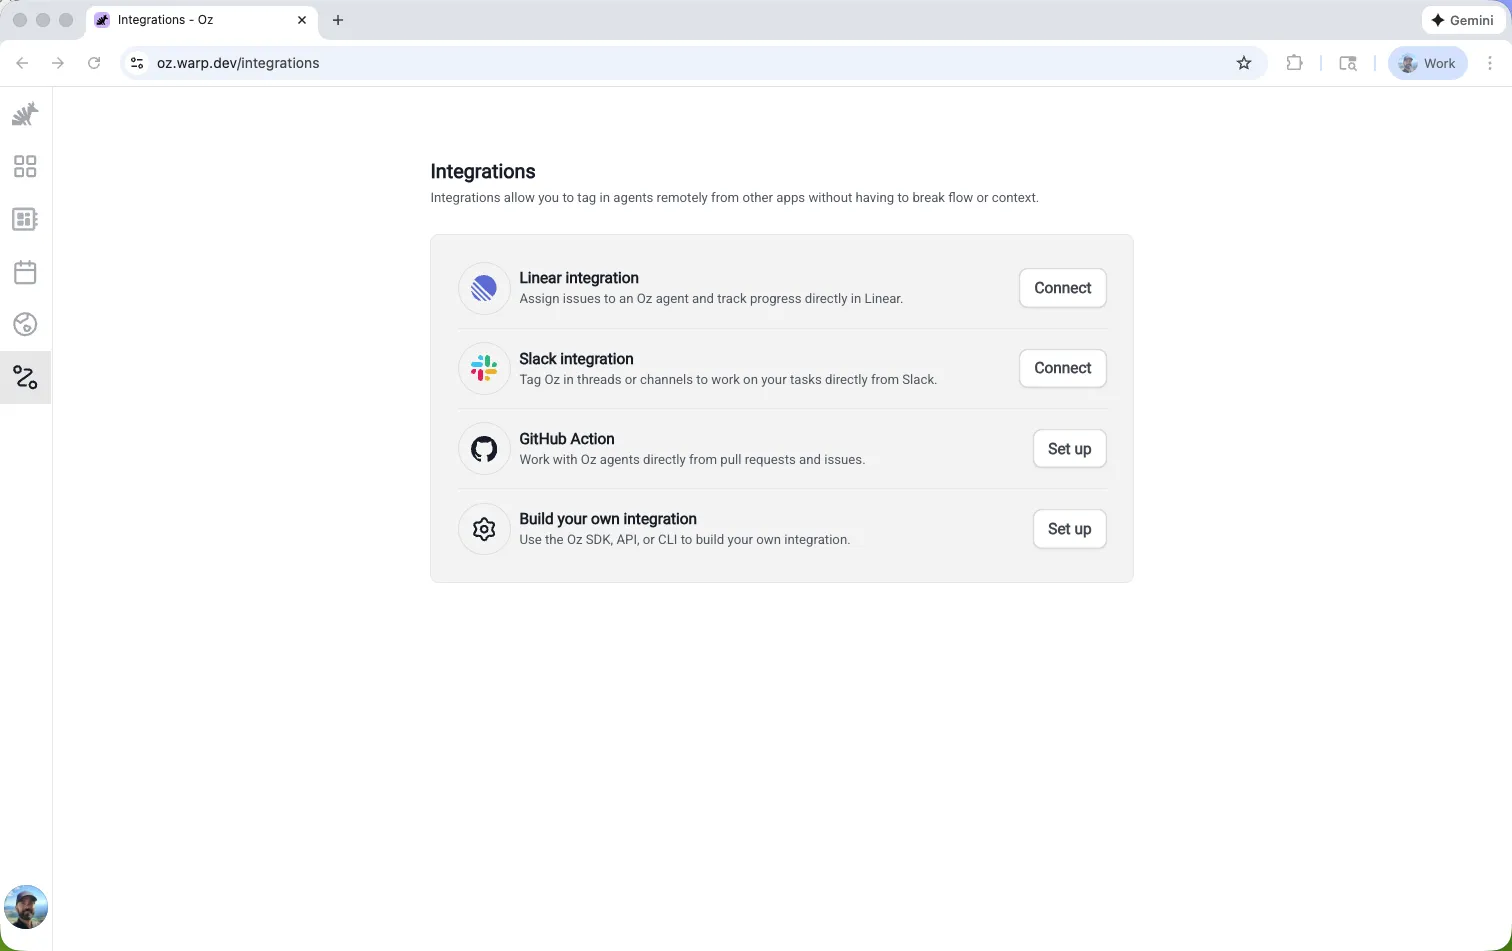
Setting up an integration
Section titled “Setting up an integration”Click an integration to start the guided setup flow. You’ll authorize Warp to connect with the external service, select an environment, and configure any integration-specific settings.
Related resources
Section titled “Related resources”- Cloud Agents Overview — Learn about cloud agents and when to use them
- Agent identities — Team-scoped bot accounts that own and execute runs
- Skills as Agents — Run agents based on reusable skill definitions
- Scheduled Agents — Run agents automatically on a cron schedule
- Environments — Configure runtime context for cloud agents
- Managing Cloud Agents — Monitor agent activity and inspect runs
- Oz CLI — Command-line interface for running agents
- Oz API & SDK — Programmatic access to cloud agents